http://www.macworld.com/article/161311/62_things_you_can_do_with_dropbox.html
62 things you can do with Dropbox
Ask Macworld editors to name our favorite apps, and most of us would mention Dropbox. The file-synchronizing service has revolutionized the way we use our Macs; we’re always looking for new things it can do.


Towards that end, a couple of months ago we posted a note on Macworld.com, asking readers, “How do you use Dropbox?” The response was incredible: Between our forums and email, we received nearly 250 suggestions. We sorted through them and then boiled them down to our 60 favorites. (We added two tips of our own at the beginning, to establish the basics.)
The Basics
1 Go to Dropbox and set up an account. Next, download and install the Dropbox app. Put files and folders that you need to access from various locations and devices into your new Dropbox folder. Then repeat these steps on your other Macs, Windows PCs, and iOS devices. One benefit of storing important files in Dropbox is that it automatically retains older versions of your files, so you can revert to them if necessary.
2 Create folders in Dropbox, and then create symbolic links to those folders on your Mac. Once you’ve done this, whenever you appear to be saving a file to a folder on your Mac (to ~/Documents/Work, say) you’re actually saving it to Dropbox (/Dropbox/Work).
There are a couple of ways to create symbolic links. To do it manually, open Terminal (in /Applications/Utilities) and enter ln -s ~/Dropbox/newfolder ~/path/to/symbolic/link (adjusting as necessary for the locations of your folders). So, for example, if you wanted to move your Documents folder to Dropbox, you could do so and then enter this command in Terminal: ln -s ~/Dropbox/Documents ~/Documents.
If you’d rather not futz with the command line, you could instead use utilities such as MacDropAny (), SymbolicLinker (), or DropLink to accomplish the same thing.
What you store
3 It’s probably impractical to put your entire user folder in Dropbox, but you can put the most important folders there: The Documents folder is an obvious one. The Music and Photos folders might work if you have enough Dropbox space. (Remember, you can upgrade from the 2GB that Dropbox gives you for free to 50GB [$10 per month] or 100GB [$20 a month] paid accounts.) Create symbolic links to those folders from your various machines, and you’ll have essentially the same Mac wherever you go.
4 If your hard drive is especially small, make room on it by moving some of your files to Dropbox.
5 Many of us store the files and folders for active projects on the desktop. Put them in Dropbox instead.
6 Scan important personal documents—your passport, driver’s license, marriage certificate, and so on—and store the scans in Dropbox; that way, you can get to them anytime you need to provide a copy.
7 Archive the original installation files of your apps so that you can install (or reinstall) them as necessary on any of your Macs.
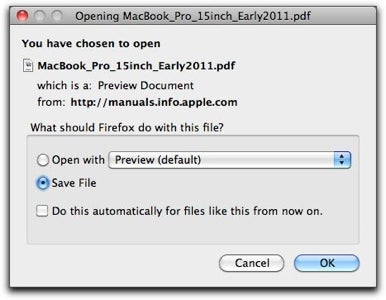
Store copies of user manuals (see #8).
8 Download PDF copies of the user manuals for products you own—appliances and home-entertainment equipment especially—from the vendors’ Websites, and then save them all to Dropbox.
9 As long as your music collection is small (or your Dropbox storage allotment sufficiently large), store your iTunes media in Dropbox: Create an iTunes Media folder in Dropbox and copy your media files to it. In iTunes, go to iTunes ▶ Preferences, select the Advanced tab, and select the Dropbox folder as the iTunes Media Folder Location. (You shouldn’t sync the iTunes Music Library.xml file; doing so can reportedly make iTunes unstable.)
10 Synchronize Address Book contacts by moving the ~/Library/Application Support/Address Book folder to Dropbox and then creating a symbolic link from its old location to its new one.
11 If you use an inventory app such as Home Inventory () or My Stuff () to keep track of your belongings, save its data files in Dropbox. If the worst should come to pass, you’ll have a full list of items to refer to for insurance purposes.
12 Several third-party utilities—notably 1Password () and TextExpander ()—let you store their data files in Drop- box; you make the change in each program’s preferences. Even if there isn’t explicit Dropbox support, you can sometimes synchronize an app’s data files by (a) finding out where those files are stored and then (b) using the symbolic link trick to move them to Dropbox.
13 Add an extra layer of protection to Dropbox’s own security by creating an encrypted container within your Dropbox folder. Several third-party utilities—including TrueCrypt—will help you do so; or you can use OS X’s own Disk Utility to create an encrypted disk image. Don’t use OS X’s FileVault with Dropbox; they do not get along.
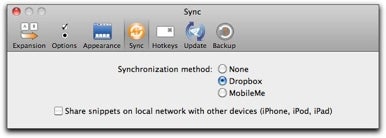
Sync data for apps like TextExpander (see #12).
14 Programmers: Check an Xcode project out of the source-control system at work and into a Dropbox folder. At home that night, fire up Xcode, pointing it at the same Dropbox folder, and continue working. When you get back to work the next day, check the project back into source control.
15 Web developers: Use Dropbox to store “local” copies of files you’re working with on live servers. As you change those files, from different locations, they’ll synchronize, so you’ll always have current copies to work on.
16 Move the Web Receipts folder to Dropbox, and then edit the Save To Web Receipts Folder workflow so it points to the new location. Unfortunately, because that workflow is actually a Python script, editing it is nontrivial; you can’t use Automator to do it. The instructions are available online, if you care to search. It’s probably simpler to just create a new Save Receipts shortcut instead.
To do so, navigate to /Library/PDF Services and move the existing Save PDF to Web Receipts Folder.pdfworkflow script somewhere else for safekeeping. Now move the Web Receipts folder from your Documents folder to Dropbox. Make an alias of it (not a symbolic link), and drag that alias into /Library/PDF Services. If you want to, you can rename the alias to make it more active—‘Save To Receipts Folder,’ perhaps.
17 Keep your iWeb domain files in Dropbox. (By default, they’re in ~/Library/Application Support/iWeb/Domain.)
18 Store all your plain-text notes in Dropbox. Plain text is the ideal cross-platform format, and there are many, many text editors (for both OS X and iOS) that are Dropbox-friendly.
19 Synchronize your browser bookmarks. If you use Safari, that means moving the folder ~/Library/Safari to Dropbox, and then creating a symbolic link from the old location to the new.
Firefox stores its bookmarks in a file called ‘places .sqlite,’ which is buried in the folder ~/Library/Application Support/Firefox/Profiles/randomsequenceofcharacters.default. You could synchronize that one file in Dropbox as you do other files. Or you could synchronize your entire profile‚ which includes your history, saved tabs, and more, in addition to bookmarks, by synchronizing that entire folder.
20 If you’d rather not go to the trouble of synchronizing bookmark files or profiles, you can always sync .webloc files linking to specific Websites.
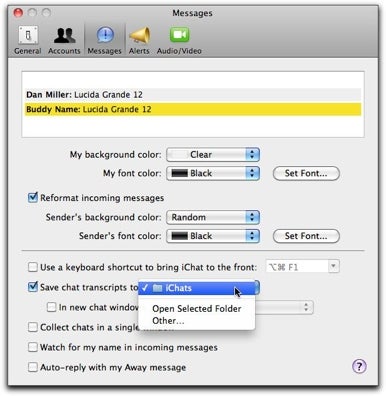
Keep iChat logs in sync (see #21)
21 Sync instant-messaging transcripts: If you use iChat, move the iChats folder from Documents to Dropbox. Then open the Messages tab in Preferences and select that folder from Save Chat Transcripts To. If you use the Adium IM client, its logs are kept in ~/Library/Application Support/Adium versionnumber/Users/Default/Logs.
One file, many places
22 Keep your grocery list as a text file in Dropbox, where it will be accessible from anywhere via a smartphone or an iPad. You can add to it from anywhere; if you share it, so can your housemates, say.
23 Before you leave for a business trip, save work documents you’ll need in Dropbox. You can then access them from virtually anywhere via a Mac, an iPhone, or an iPad.
24 If you use both Macs and Windows PCs (whether they’re in the same location or in different places), you can access files stored in Dropbox from all of them. That doesn’t apply to data alone: Some cross-platform apps use the same format for their settings files on both Macs and PCs; Mozilla’s Thunderbird email apps is just one example.
25 Set up a Drop- DAV account, and then synchronize files from the iWork suite on the iPad with Dropbox.
26 Sync files with Android phones, using that platform’s Dropbox app.
27 If your company has more than one location, and you frequently shuttle between them, keep important files in Dropbox so they’re available wherever your office is that day.
28 Give meeting participants iPads, and sync all of those tablets to the same Dropbox folder. You can then distribute meeting agendas and background materials instantly to everyone at the same time.
One file, many users
29 Take advantage of Dropbox’s LAN Sync feature to directly synchronize Macs that are on the same local network. It’s simpler than configuring standard OS X file sharing.
30 Set up separate folders in Dropbox’s Public folder for different clients or coworkers, and then send the separate URLs to each. Alternatively, set up a different shared folder for each project, and then distribute that URL to all project participants.
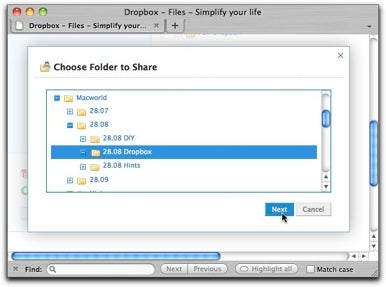
Share files for different projects from Dropbox's public folder (see #30)
31 If you outsource some work to outside contractors, post the work files they’ll need in Dropbox and mail them the URL; you can then disable the links when the job is done.
32 Many email services have size limits on file attachments. To send files that are too big for email, post them to a shared folder in Dropbox instead.
33 Working with someone who doesn’t have a Dropbox account? Are the regular shared folders or the Public folder not working for you? Then use AirDropper (airdropper.com) to send and receive files. It’s Dropbox-compatible, so files transferred by AirDropper are accessible in Dropbox.
34 Instead of writing the minutes of a meeting by hand, record everything in audio and then upload the resulting .wav file to Dropbox. From there, you (or someone who works for you) can download it for transcription.
35 To share work files among coworkers, store them in Dropbox’s Public folder; Control-click (or right-click) on a file in that folder, select Copy Public Link, and share that URL. Or share a folder: At dropbox.com, Control-click on a folder, and then select Invite To Folder and provide an email address. Or select Share A Folder from the top menu.
36 You can save money on postage by scanning large documents and then depositing the scans in Dropbox. It’s a lot cheaper than sending those same documents via mail or some other delivery service.
37 If your teleconferencing service doesn’t have its own file-sharing tools (or if you use a generic VoIP service like Skype for your phone meetings), use Dropbox to share the files you’ll refer to on the call.
38 Have traveling workers store scanned receipts and expense reports in a Dropbox folder to which your accountants have access.
39 In projects that require multiple iterations of a document, use Dropbox’s built-in backup as an ad hoc versioning system; if you need to roll back to an earlier version of a work file, you can.
40 Store your company-wide help files and policy documents in Dropbox. That way, when you update one of them, everybody can access the same new versions at the same time.
41 Copy photos to Dropbox, and share the URL with family and friends.
42 Keep your resume in a Dropbox folder and then send out a link to it to potential employers.
43 Post PDFs of the menus (take-out or otherwise) for local restaurants in a shared Dropbox folder, and then use that to coordinate meals out with friends and family.
44 Share a Dropbox folder with parents, and point their Macs to that folder as the source for desktop and screensaver images. Then, when you post pictures of your kids to that folder, they’ll show up on the grandparents’ machines automatically.
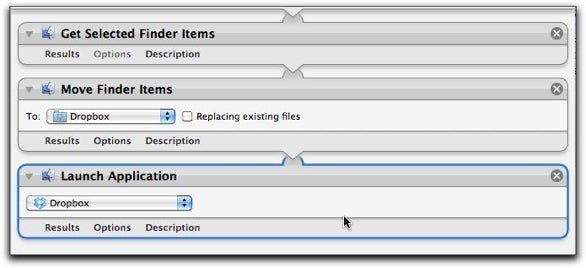
Create an Automator workflow that moves selected Finder items to Dropbox (see #56)
45 Keep a far-flung family up-to-date on the latest goings-on by posting personal newsletters to a shared Dropbox folder.
46 Use Dropbox to collaboratively care for aging relatives: If the people who are collaborating on an elder’s care live in different places, everyone can post updates to medical and personal information in Dropbox, so everyone has the same information; you can also leave notes for each other in a text document.
47 Share photos from your travels with folks back home by posting the pictures from your iPhone to a shared Dropbox folder.
48 If you’re the default tech-support person for your friends and extended family, create shared help documents or screencasts that answer the most frequently asked questions.
49 Collect family history documents and photographs from widely scattered relatives in one shared folder.
50 Ask each student to create a Dropbox account and then submit their homework to a shared folder in it; no more “I forgot my computer” excuses.
51 Store reading assignments that are in PDF or some other digital format in a Dropbox folder. If you make annotations in an app like GoodReader, your notes will then be available from anywhere.
Beyond the basics
52 Go to the Send to Dropbox Website (sendtodropbox.com), click on Connect To Dropbox, and provide your Dropbox credentials. You can now email files to Dropbox. That makes all sorts of scenarios possible. For example, create a document in Google Docs and then opt to share it. In the Share drop-down menu, select Email As Attachment and provide your Send to Dropbox email address; the Google Doc will appear in Dropbox’s Attachments folder.
53 Open email attachments on the iPad in GoodReader. Review the document and then save it from GoodReader to Dropbox. When you get back to your Mac, a copy will be waiting for you in your Dropbox folder.
54 Use Dropbox as a backup for your backup. Assuming that your Time Machine backup sets aren’t too huge, periodically save one of them to Dropbox. If both your computer’s hard drive and your backup drive should fail, you could still recover some data. Or, if you notice that your Mac is acting funny, quickly copy important files to Dropbox, in case your Mac really falls apart.
55 Save incrementally between Time Machine’s hourly backups: Save a copy of whatever you’re working on at the moment to Dropbox, adding some sort of time-stamp to its filename.
56 Create an Automator service that copies or moves selected files in the Finder to Dropbox (with permission to overwrite existing files), and then launches the Dropbox app for immediate synchronization.

Create a rule in Hazel to automatically process files that are saved to a specific Dropbox folder (see #59)
57 Normally, Dropbox saves versions of your files for 30 days. If you have one of the for-pay Pro accounts, you can install the Pack-Rat add-on. Dropbox will then save those files indefinitely.
58 If you have a file on a remote Mac that you need to access from your iOS device, use SSH or a VNC app like LogMeIn to connect to the Mac and then copy the file to your Dropbox folder; when you next sync, the file will be available on your iPhone or iPad.
59 Automate Dropbox folders by using OS X’s Folder Actions or Noodlesoft’s Hazel (). For example: Save iPhone photos to a Dropbox folder that Hazel monitors. When it sees that a new photo has been added to the folder, it can then apply some image processing and copy the processed version to another folder on your Mac or in Dropbox.
60 Forget about complicated file-sharing settings: Just install the Dropbox app on all of your devices.
61 Configure your BitTorrent client to monitor a Dropbox folder and immediately initiate downloads when a new .torrent file is added to it. You can then copy a file to that Dropbox folder to initiate the download. (Just make sure your client is configured to save those downloads to somewhere other than Dropbox.)
62 If you need to give the same message to a bunch of different people, don’t call them one by one and read from a script. Instead, record the message and post the recording to a public Dropbox folder. Then email the link to everyone.
What You Shouldn’t Sync
Users have reported problems when they’ve tried to synchronize some files via Dropbox. One common thread among those problems is that if a program checks for conflicted copies of its data files, Dropbox could confuse it.
The three biggest apps for which we’ve seen reports about problems are:
- iTunes (the iTunes Music Library.xml file);
- iPhoto (its libraries);
- and Quicken (its data files).
No matter which apps you’re synchronizing via Dropbox, you should be careful to close those files as soon as you’re done with your immediate editing session. That way you won’t inadvertently leave a file open in one place and create file conflicts when you try to open it from another.